| Arabesque |
|
|
You begin with a nice tree. Cut it down; cut it up; and send all the good boards somewhere else.
Once you're down to the mill-seconds lumber, you think of something that will look hard and
take a long time to finish, and then you start calculating.
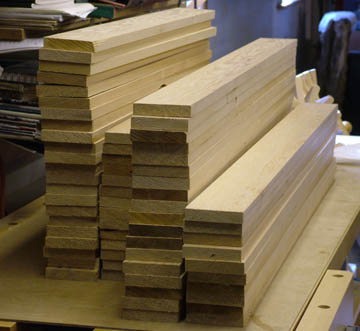
Depending on board length and pieces to be cut, wastage = 17% to 12.5% for end snipe; 10% to .1% for left-over cutoffs; 33% to 27% knots, cracks and other imperfections; plus kerf wastage from sawblade, all together amounts to about 35% usable, though there may be enough left-over pieces to make a second sculpture. Eventually you figure out how much wood you will need, and how much waste there will be, and how unsure you are about how much waste there will be, and finally you decide how many boards to start with. Then add 25%. |
|
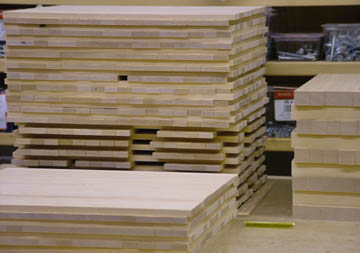
| The boards are all marked to be sure that they are run through the jointer and planer a sufficient number of times to completely reveal fresh, flat surfaces. |

|
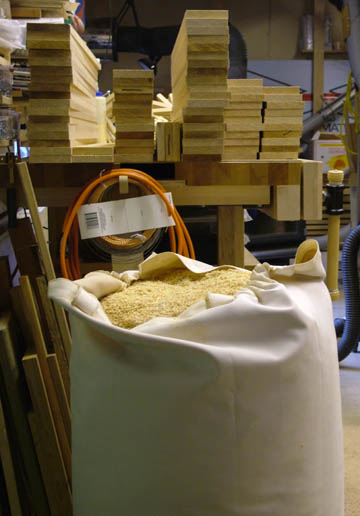
| Planer shavings from project. |
|
| Because the thickness planer can leave the first and last few inches with slighly less wood, the last three inches of each end of each board is removed. |
|
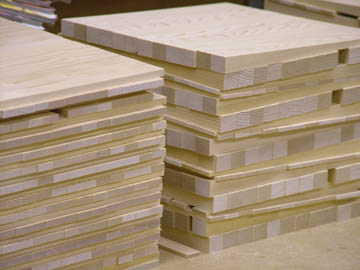
| The boards are divided into two piles for cutting, one for the wedge-shaped pieces and another for the strips, depending on which length causes less waste for each board. |
|
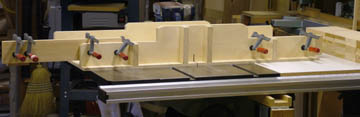
| A jig is used for all length cuts to ensure accuracy |
|
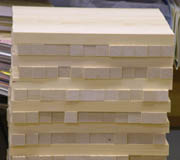
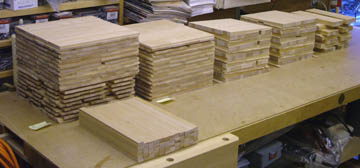
| Next, the short sections are ripped to width. The pieces from each board are kept separate by stacking them in layers. Anytime a defect (crack, resin, cross-grain, knot, etc) is encountered, it is marked with an X so that it won't accidently get used. |
|
| Again, a jig is used for these ripping cuts, both for accuracy and to keep hands away from blade. The clamps are made by deStaCo and are wonderfully precise. |
|
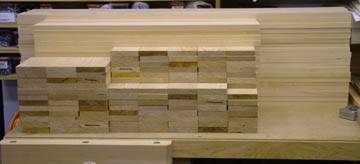
| The nearly square cross-section pieces are each ripped into two nearly equal pieces, then ripped once more to a little less than the narrower of the two widths to be sure they all end up exactly the same thickness. |
|
| Next the wedges are cut. |
|
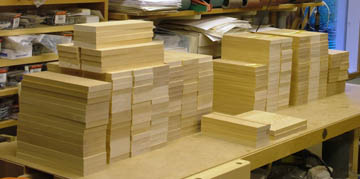
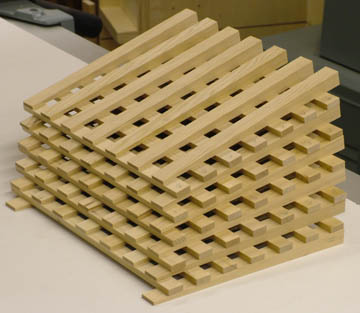
| All the wood has been cut, and there are 506 wedges and 1039 strips. The final sculpture will use 424 wedges and 413 strips. The uncomfortably small margin of extra wedges will hopefully be sufficiently compensated for by the fact that almost all of them (except for both ends) will be hidden inside the scultpure. |
|
| After dry stacking a number of possible variations on the original idea for this sculpture, a decision is made about which model to use for the finished sculpture and what it will look like. |
|
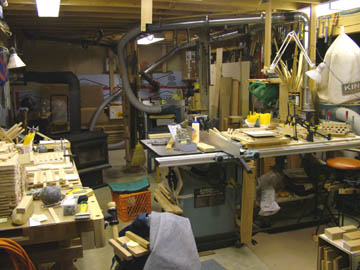
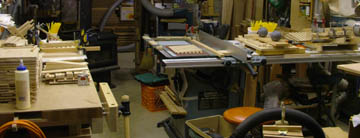
| All sorts of jig making and testing brings the shop to its most cluttered state before things are ready to proceed with the assembling. |
|
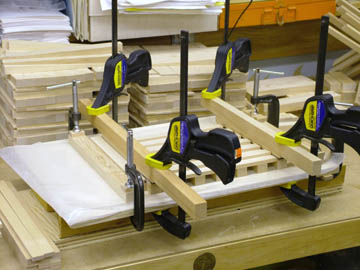
| Four stations are set up for assembling, allowing gluing on one to proceed while the glue cures at the previous station. When two stations have glue curing, a little sanding touch up can be done at a third station, until ready to assemble at the fourth station. |
|
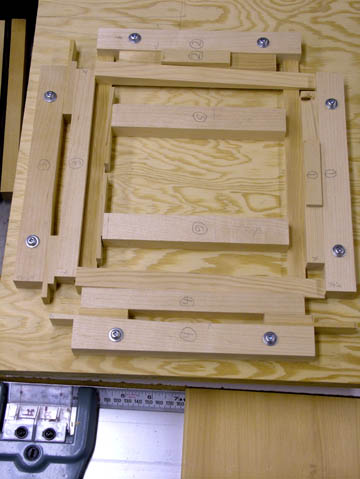
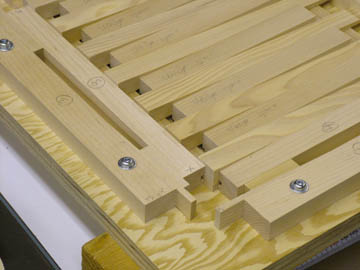
| The first is a basic frame for assembling the first four pieces, and later to fill in with five more evenly-spaced wedges. |
|
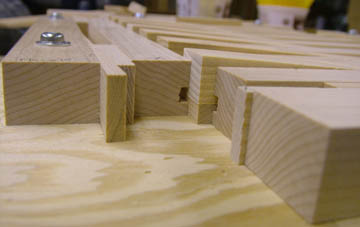
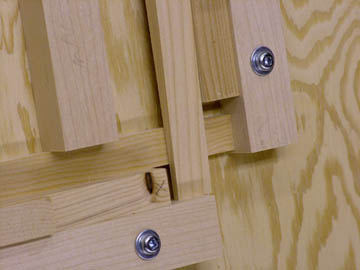
| Detail of gluing frame: corner where both edges of overlap are protected from glue spillover by grooves in clamping cauls. |
|
| Detail of gluing frame: one of two corners where one edge is protected from glue spillover by groove in clamping caul. |

|
| Detail of gluing frame: the corner where neither edge of overlap needs protection from glue spillover. |
|
| Within a few days of beginning to glue, the fishing weights will be replaced with traditional clamps to press the two wedge pieces down onto the two rectangular strips. |

|
| The same basic frame is next used to fill in with five more evenly-spaced wedges. |
|
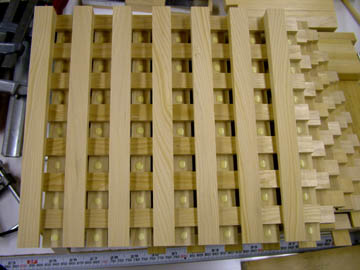
| Next, in the second jig, five evenly-spaced strips are added to the other side of the basic frame. |
|
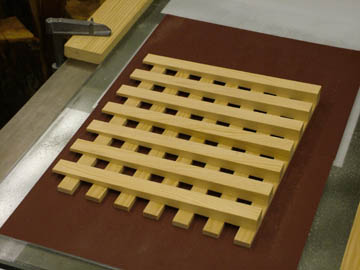
| Sandpaper glued to quarter-inch glass makes sure any uneven assembly so far doesn't accumulate as the final structure is assembled. |
|
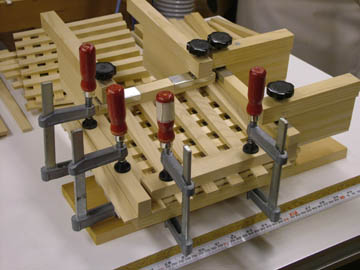
| The hair-raising step is getting 49 drops of glue accurately placed (this is no time to have to start scraping off glue that was inadvertantly placed on the wrong piece of wood or in the wrong place). |
|
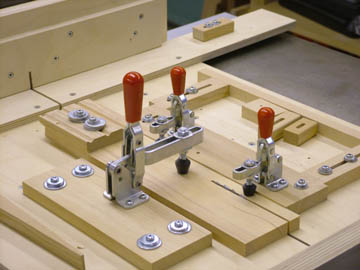
| The clamping jig uses four specially made clamps and four correctly beveled clamping cauls (wood protectors). |
|
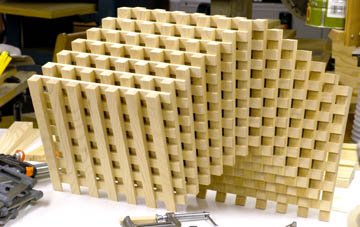
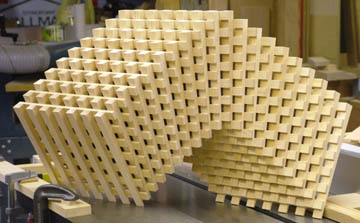
| One of the real frustrations is getting a fair way along in the process (in this case 14/61 finished), and finding a nice shape that could stand on its own as a sculpture - and would, if it wouldn't then be necessary to start again from the beginning. Maybe later an assistant will make some of the intermediate stage sculptures. |
|
| Temptation #two: (20/61 finished) |
|
| Temptation #three: (26/61 finished) |
|
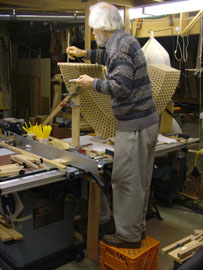
| Eventually the sculpture gets too big to work on while standing on the floor and a milk carton is used to get a high enough vantage point for placing those 49 drops of glue. |
|
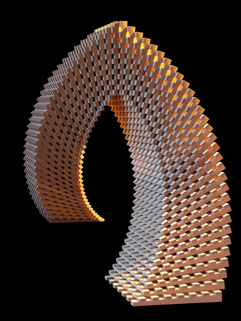
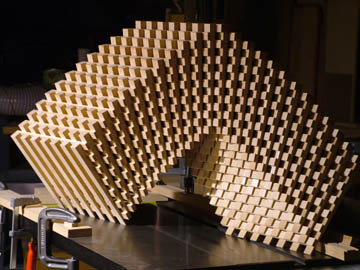
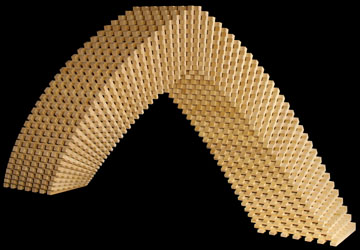
| Finally, over three months after beginning, Arabesque is finished, but not before spending three days and coming up with about 150 possible names, none of which seemed right. The impasse was broken while listening to CBC's Jurgen Gothe when he announced the next piece of music: Three Arabesques by Nikolai Medtner. The sculpture is a stylized letter A, from one vantage point it looks like the ballet posture, an arabesque, and from another point of view it looks like a stylized caligraphic Arabesque. Perfect! |
|