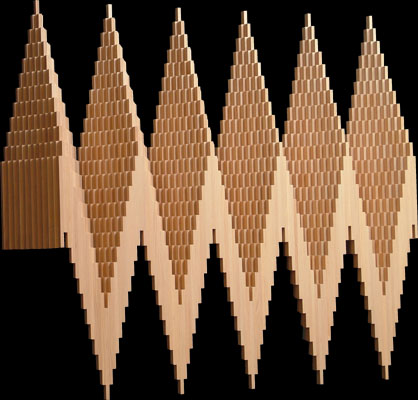
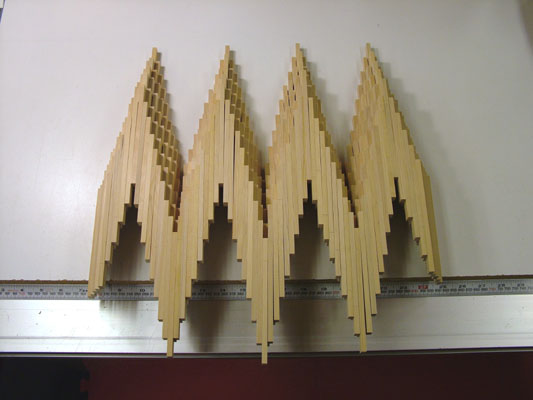
| Chain Reaction |
|
| This piece is made from 1342 copies of a single unit shape, 132 in the bottom layer, and diminishing by
pairs to 112 in the top (11th) layer. In order to maintain as much accuracy as possible, all pieces were
marked on three sides with codes that indicated how each piece had been milled (and was to be milled),
so even if the pieces
tumbled over, it would be possible to reposition them accurately for subsequent milling and gluing.
First, the least accurate face was marked for milling; then the narrow edges were marked,
first to remove the least accurate edge and then the remaining mark to be unambiguously enable alternating
pieces to be reversed,
front to back, and top to bottom. That way any angular inaccuracy in the setting of the tablesaw blade would
be eliminated (or largely averaged out), as well as any systematic bias in cutting width caused by the setting of the fence. All this
would not be necessary if the error tolerance weren't so low.
For instance, if the error in thickness of the pieces was just 1/128th of an inch each (for comparison, rulers are only very occasionally marked in increments of less than 1/32"), the third layer (with 128 pieces) would be one inch too long. The pieces are 3/16" thick, so an error of 1/16" would be quite noticeable, thus the accuracy of each piece had to be less than approximately 1/2000" and alternating pieces top to bottom and end to end was a big help in cancelling out systematic errors. |
|
| The earliest incarnation in wood |
|
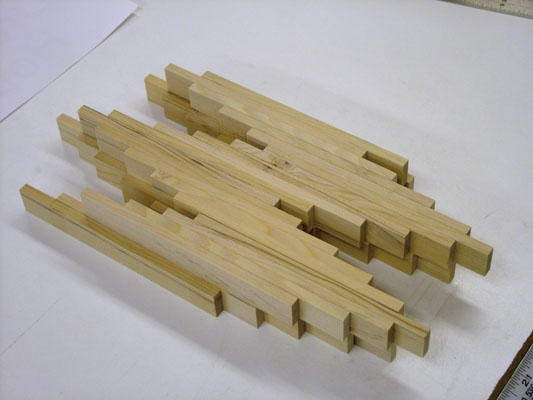
| As is often the case, the first step in the construction depended on a supply of reasonably similar unit pieces to try arranging in various ways. This time it was easier because there was an earlier maquette of what was intended. | |
| The intent was to utilize leftover wood pieces. |
|
| This wood was originally cut from rough-sawn lumber, or rather it is the leftover pieces from cutting units for All Is Number, pieces that weren't thick enough for the earlier piece. There was more wood (around 2150 pieces) than was expected to be necessary (1342), but one never knows how many problem pieces will be encountered, so all of it was milled to the same dimensions. Each piece already has two cut surfaces from the original milling, a face and an edge. | |
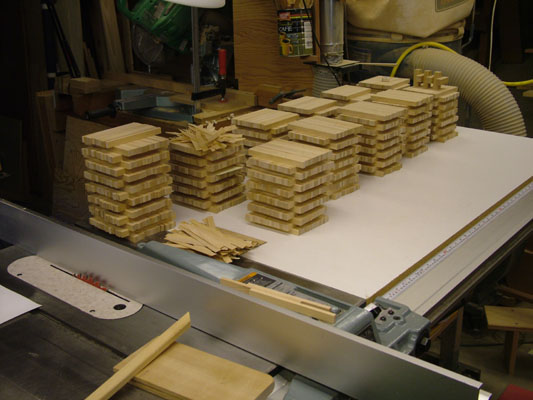
| 15 piles of rough-cut pieces |
|
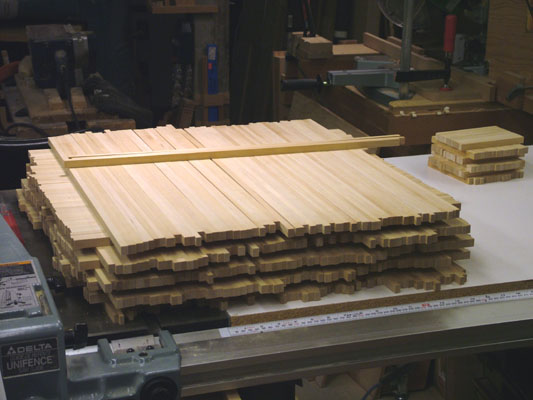
| The pieces were all cut into short lengths to reduce any wastage from warping. Before the next cut, each piece was placed against the tablesaw fence to be sure that the reference face was flat. Then the pieces were marked by pencil to indicate which sides had been cut. | |
| After first face cut |
|
| The pieces are all approximately equally thick now, and the original 15 piles have been reduced to 11, but there was no reason to assume there weren't some pieces thinner than the rest, so another face cut was eventually done. Fortunately all the pieces were marked so it was easy to reposition any layer of wood that tumbled when being moved from stack to table. The original, reference face had been cut months earlier so was deemed unreliable, therefore the tablesaw was set for a slightly thinner cut and, the reference surface was cut again; unless the opposite surface wasn't straight, when the original surface was left alone and the opposite surface was cut again. Even with extreme vigilance it was possible for some thinner pieces to slip through, which necessitated later measuring (in batches of 11 and 25) to minimize the possibility of thinner pieces being glued. | |
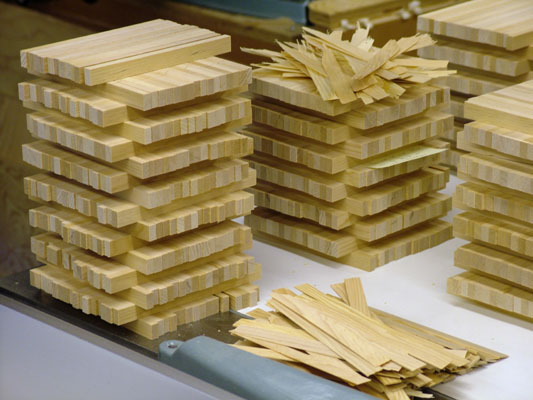
| Making useful scrap |
|
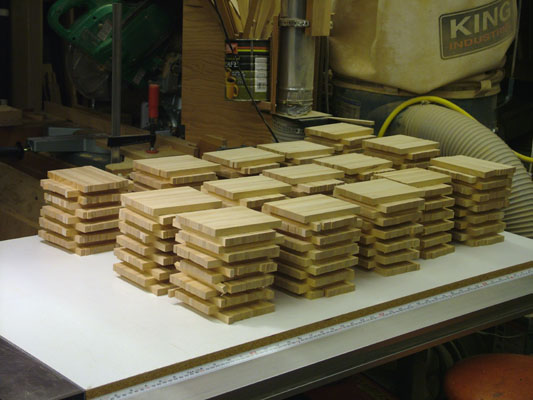
| Sometimes a piece was thick enough that a complete piece was sawn off (usually it was just sawdust). They were saved for later use, the thicker pieces will be useful as glue sticks, and the thinner ones (if absolutely necessary) can be used to glue onto a thinner stick to make it thicker. | |
| After the 2nd face cut |
|
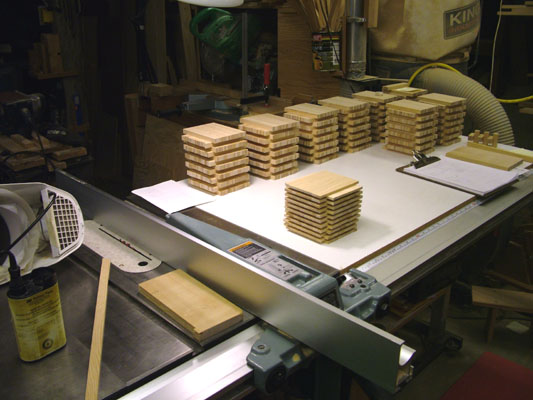
| The wood has now been reduced to nine piles. Each piece of wood can be
assumed to be equally straight and thick (though there are plenty of pieces with flaws that now start to be
segregated). The thin edges are all marked with a simple code that gives aligning information, useful again
when cutting the edges. First the concave side (if any) was cut, and marked again before cutting the convex
side (It's surprising how often seemingly straight wood has a curve in it.
After cutting, one code remained on the wood to help orient each piece for gluing. This should have been unnecessary, as the surfaces should have all been straight, parallel, and perpendicular, but for some still unknown reason, after the first face had been cut it was obvious that something was wrong. Grabbing a handful of pieces and squeezing them together produced an arc instead of a straight surface. It was never clear whether the problem lay with a tablesaw misalignment or was an artifact of ripping such thin pieces. In any event, the workaround was easy, though at the time it was just uncomfortable speculation. The theory was that alternating pieces end for end and top to bottom would keep things aligned and, sure enough, a handful of alternated units became as flat as the tablesaw table. |
|
| Reference stacking |
|
| Things can be surprisingly confusing once gluing starts, so it can be a good idea to have a reference section dry-stacked nearby, just to be able to check on things. | |
| Second reference stacking' |
|
| There were too many pieces required to set aside enough for a complete dry-stacked, six-peaked reference piece, but an incomplete four-peak stacking, together with the completed single peak answered all questions that arose, mainly questions like "will this section of this piece of wood be visible in the final sculpture," a technique that allowed a more economically use of the wood. | |
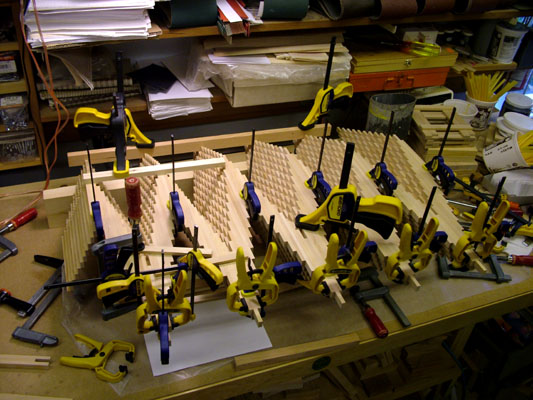
| Gluing the 8th layer |

|
| Often gluing proceeds in stages. The first layer is by far the most
important in this sculpture, as any error in width or angle would have propagated all the way up, unless it was
correctly allowed for - better to do it right the first time. The first layer also takes the most time.
There are other stages: the first, non-first
layer; the first time a new clamping arrangement is necessary; and often there are other clamping methods that
have to be devised for subsequent stages.
The pieces were glued in mirror image sections of 11 pieces each, then the mirror images were glued to make asymmetrical peaks. Vigilance was required to be sure the correct asymmetry was glued. As it happened, the right hand 11-piece section was attached one piece down from the top of the left hand piece. This had the virtue of making it harder to mistake what the proper gluing orientation was for each peak. For every layer, six peaks were clamped together at their bases so any errors could be averaged out in the placement, and sections could be discarded if they proved too wide or too narrow. Once a six-peak complete section was clamped down, then the left peak was unclamped for gluing (making sure no glue got onto the next peak to be glued). When the glue had set, the next peak was unclamped, glued and replaced and clamped. The next layer's peaks could be glued while waiting for the previous gluing to set. |
|
| Gluing the 11th and last layer |
|
| As the piece grew it became more complicated to clamp. Bars had to be clamped in place for each gluing. At the end there were four kinds of clamps needed. | |
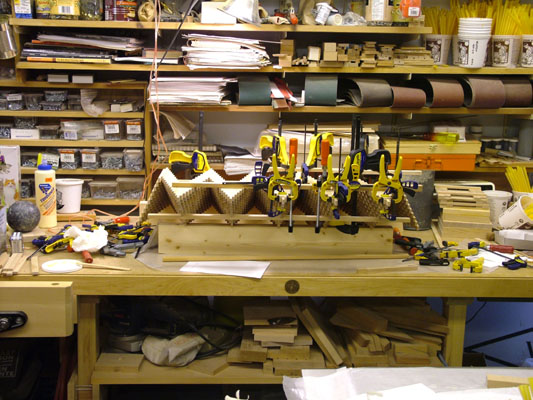
| You can never have too many clamps |
|
| Surprising how cluttered a workbench can be and still produce tidy scultptures. | |
|
Completed Chain Reaction |

|
| The sculpture seems to attract shadows and illusions. | |